These no-bake, delicious, decadent Nanaimo Bars are very easy to make and the perfect summer dessert.
This is a recipe for basic Nanaimo Bars; however, Nanaimo Bars can be made in different kinds and flavours, such as chocolate, mint, cheesecake, or even gluten-free.
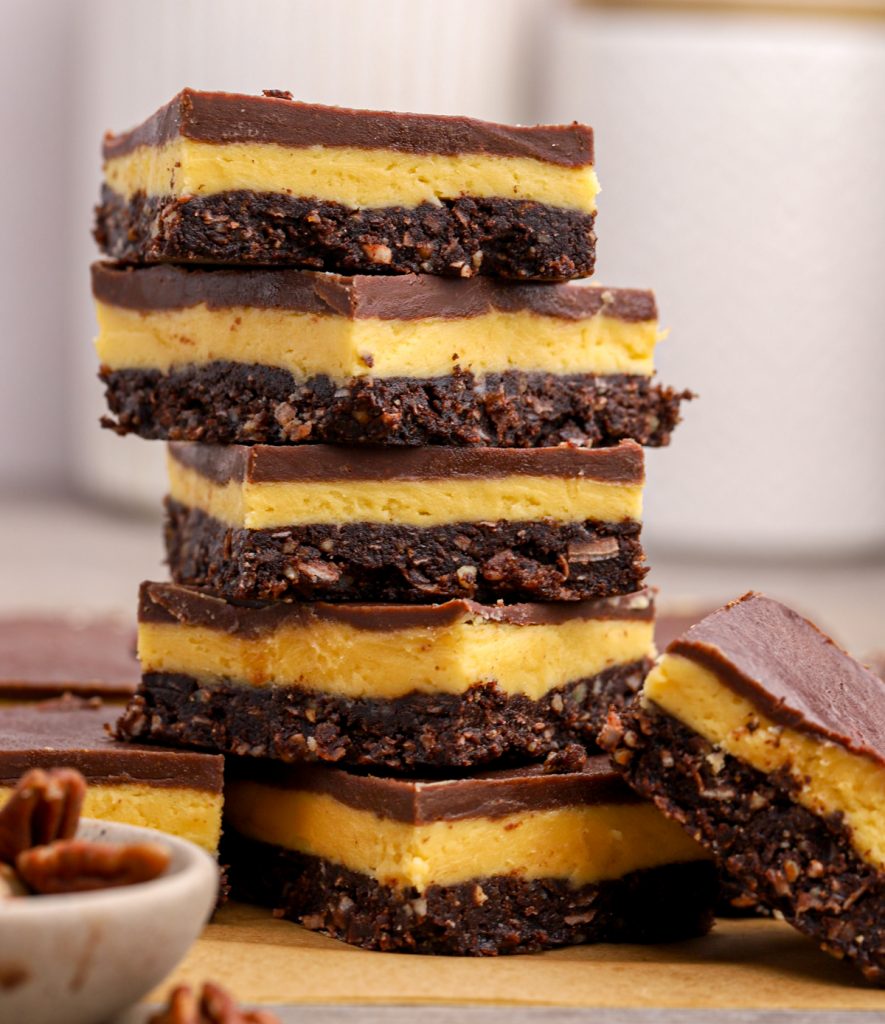
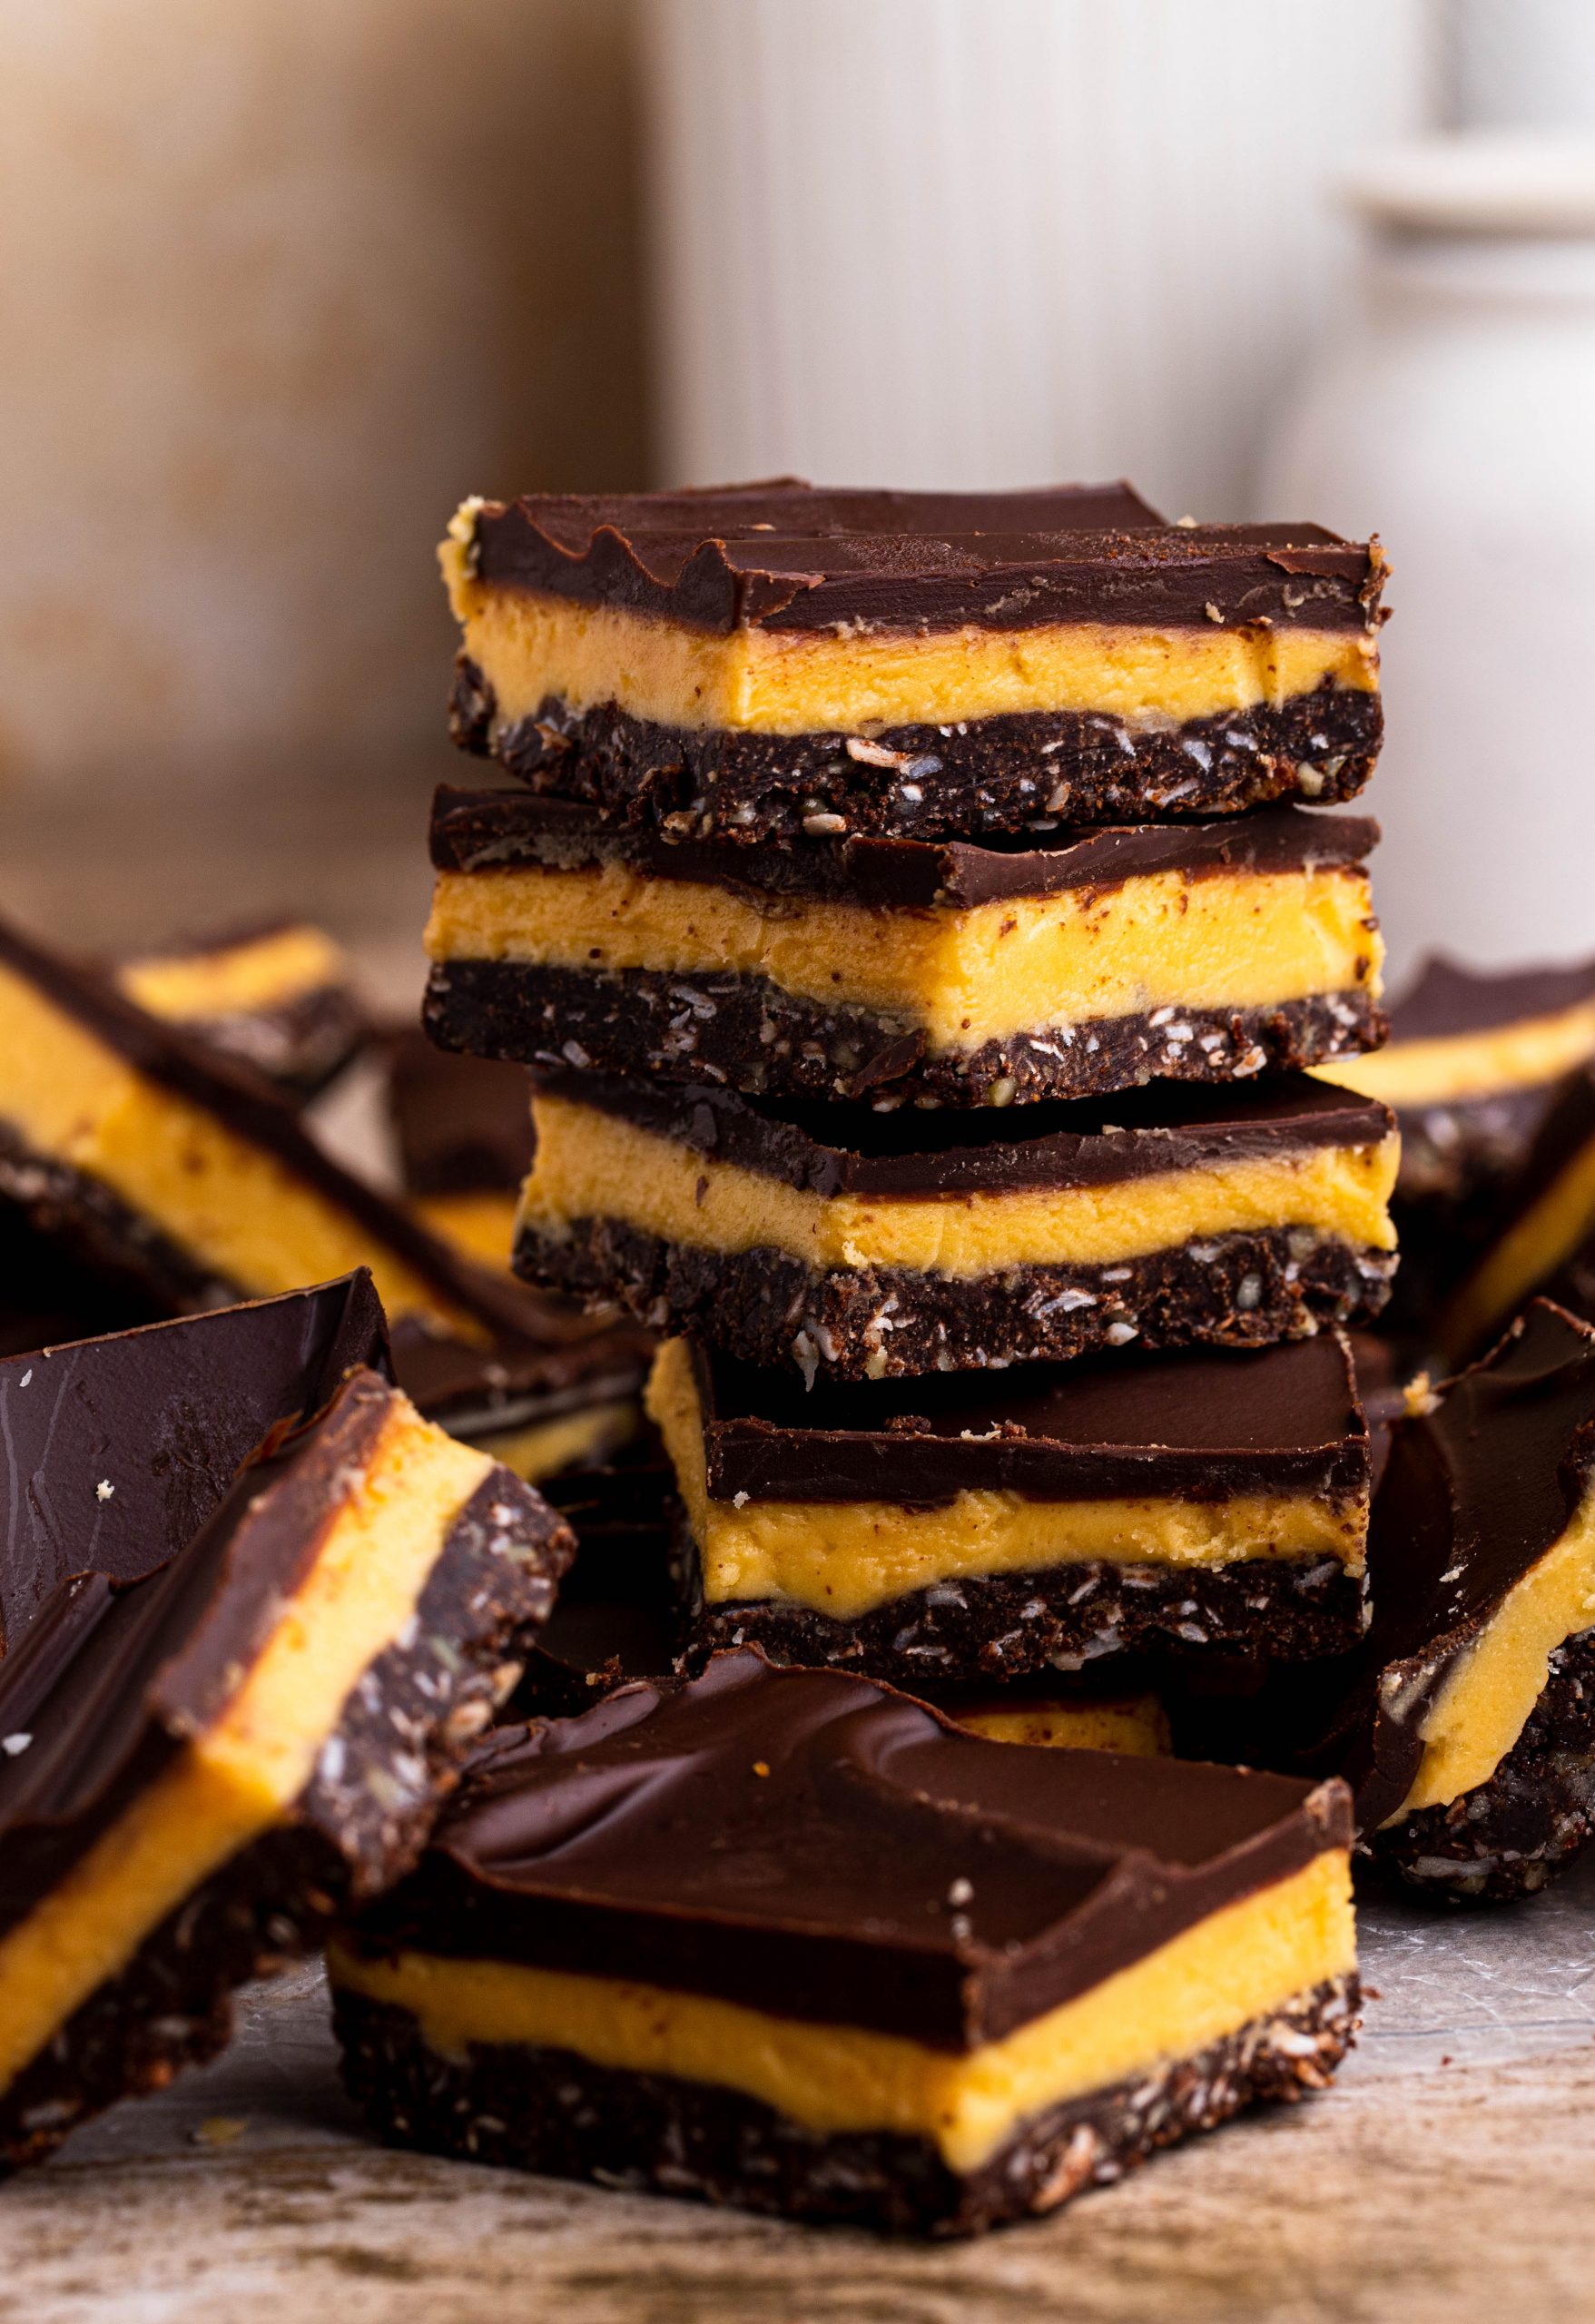
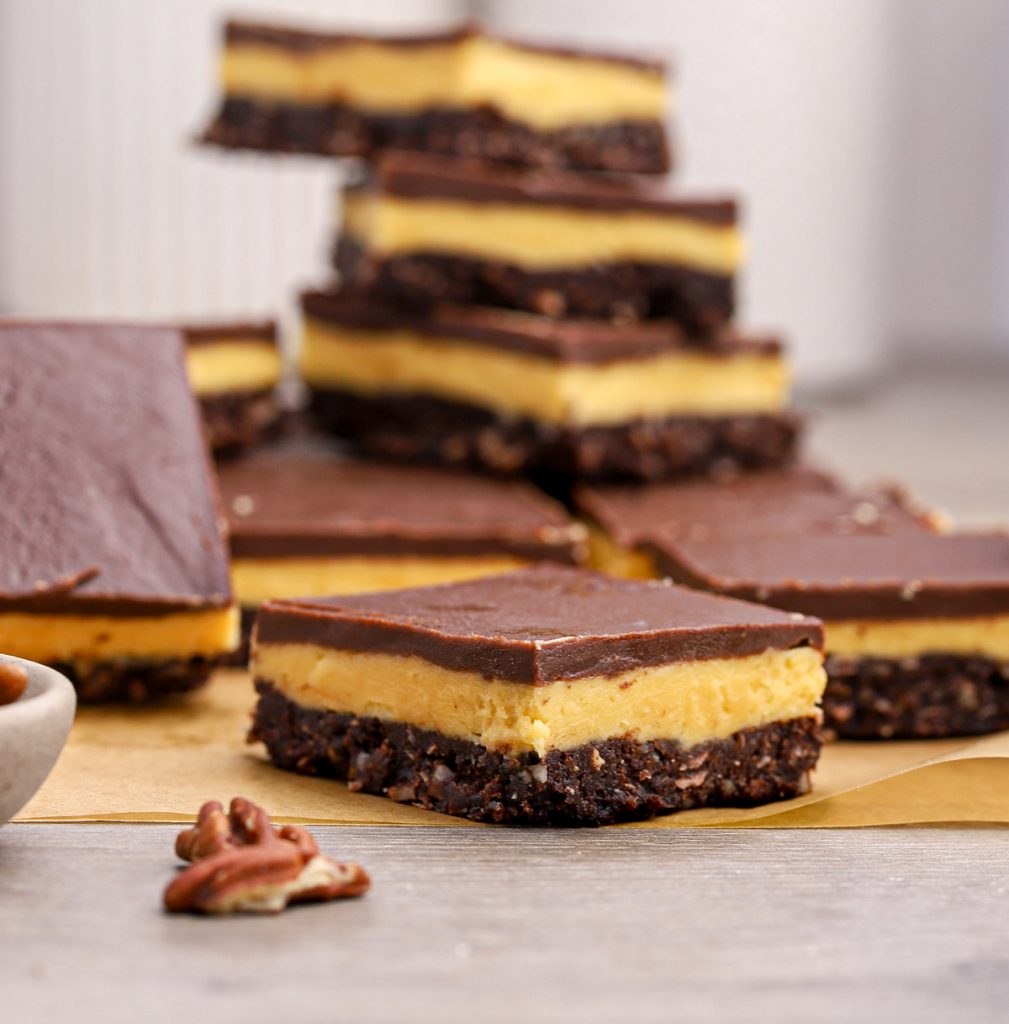
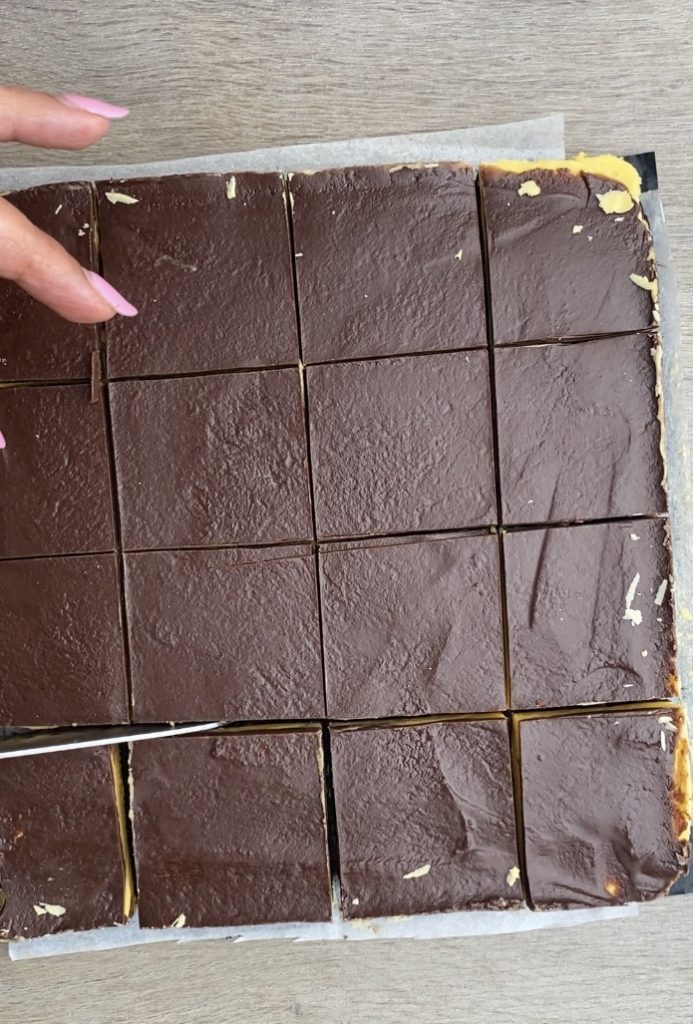
What is Nanaimo Bar?! The Nanaimo bar is a bar dessert that requires no baking and is named after the city of Nanaimo, British Columbia. It consists of three layers: a wafer, nut-coconut crumb base, custard icing in the middle, and a layer of chocolate ganache on top, Nanaimo Bars.
About This Nanaimo Bar Recipe
- Making a Nanaimo Bar batch seems to be a bit more work compared to other no-bake desserts, and it is all worth it in the end! Hey, it is a no-bake treat 🙂
- This dessert contains three layers; 1) The nut-chocolate base. 2) The soft and creamy custard layer that creates the yellowish middle layer 3). And the top rich chocolate ganache layer.
- The middle layer contains Custard Powder, an ingredient that we may not use regularly. This ingredient is available in grocery stores. Custard powder contains thickeners that give the custard a creamy and thick texture.
How To Make Nanaimo Bars
- Start making the base by melting the butter in a double boiler. After melting the butter, add the sugar and cocoa powder. We need to add an egg to the butter and cocoa. When the egg comes in contact with heat, it will cook.

- For the same reason, we are going to add the egg gradually and whisk vigorously to prevent the egg from clumping and solidifying. If this step is done properly, the mixture will look like hot fudge. Add the other ingredients for this layer. There are many choices here, such as coconut shreds, chopped pecan or walnuts, crushed crackers, etc.


- Press the above mixture on the bottom of the pan and chill. Move on to the next step.
- The middle layer contains powdered sugar, butter, and custard powder. To form the custard, we need some liquid, and that is heavy cream. Be careful not to add too much cream. Too much cream makes the custard too soft and runny, and cutting the bars won't be clean.
- Spread the custard layer over the base layer and smooth it out with a spatula. Place in the fridge, and move on to the next layer.
- Melt the chocolate on a double boiler, and add the heavy cream. Mix until smooth. Spread the ganache over the custard layer and put it in the fridge to set for at least 3 hours.
See More Bar recipes;

Storing: Keep these bars in an airtight container in the fridge for up to one week.
Disclaimer: I highly recommend using the measurements in grams & ml (instead of cups & spoons) for more accuracy and better results.
IF YOU TRIED THIS RECIPE AND LIKED IT, LEAVE ME A STAR REVIEW.
📖 Recipe
Nanaimo Bars
Ingredients
For The Base
- ½ cup Butter
- ½ cup sugar
- ⅓ cup Cocoa powder
- 1 tablespoon Vanilla extract
- 1½ cups Digestive cookies, Crushed
- 1 Egg, Room temperature, lightly beaten
- ½ cup Pecans, Finely crushed
- 1 cup coconut, Finely shredded
For The Filling
- ½ cup Butter, Room temperature
- 3 cups Powdered sugar, Sifted
- ⅓ cup Custard powder
- 3-4 tablespoon Heavy cream
- 2 teaspoon Vanilla extract
For The Ganache
- 1 cup Semi-sweet chocolate, Chopped
- 3 tablespoon Heavy cream
Instructions
How To Make the Base
- Grease and line a 9X9 inch baking pan, and line with parchment paper. Leave a couple of inches from the sides for lifting.
- Start a double boiler with low boils. Melt the butter over the double boiler.½ cup Butter
- Add the sugar, cocoa powder, and vanilla extract. Mix well.½ cup sugar, ⅓ cup Cocoa powder, 1 tablespoon Vanilla extract
- Remove from the heat and gradually stream in the egg, and whisk vigorously.1 Egg
- Put back on the heat and cook for a couple of minutes to cook the egg. The mixture will resemble hot fudge.
- Add the crushed digestive cookies, chopped pecan, and shredded coconut, and mix well.1½ cups Digestive cookies, 1 cup coconut, ½ cup Pecans
- Press the above mixture on the bottom of the greased pan, and smooth it out with a spatula. Chill and meanwhile prepare the custard layer.
How To Make The Custard Layer
- Beat the butter, custard powder, and vanilla until combined.⅓ cup Custard powder, 2 teaspoon Vanilla extract, ½ cup Butter
- Mix in 1 cup of powdered sugar and 1 tablespoon of heavy cream at a time. Repeat this step until the mixture is smooth and spreadable. Add 1-2 more teaspoons of cream, if needed, to reach a spreadable consistency. DO NOT ADD TOO MUCH CREAM.3 cups Powdered sugar, ⅓ cup Custard powder, 3-4 tablespoon Heavy cream
- The mixture will turn into light yellow color. Spread this mixture over the base and place it in the fridge.
How To Make The Top Layer
- Melt the chocolate over the slow double boiler stirring constantly. Add the cream and mix until smooth.3 tablespoon Heavy cream, 1 cup Semi-sweet chocolate
- Quickly spread this mixture over the custard layer. Act fast. Place in the fridge for at least 3 hours before cutting.
Leave a Reply